Paid Plan
The document information input function allows individual items to be created and entered in addition to the basic document information provided by CloudSign.
This means special items that had previously been managed independently like “name of sales staff,” “name of client staff in charge,” “rates” and “payment cycles,” can now be specified in CloudSign and managed in the most suitable form for each company.
Note that independent items can only be specified by “team administrators.”
Contents
1. Click the “Team settings” in the “Manage Settings Screen.”

2. Click Edit in “User defined document information” section to open the edit screen.
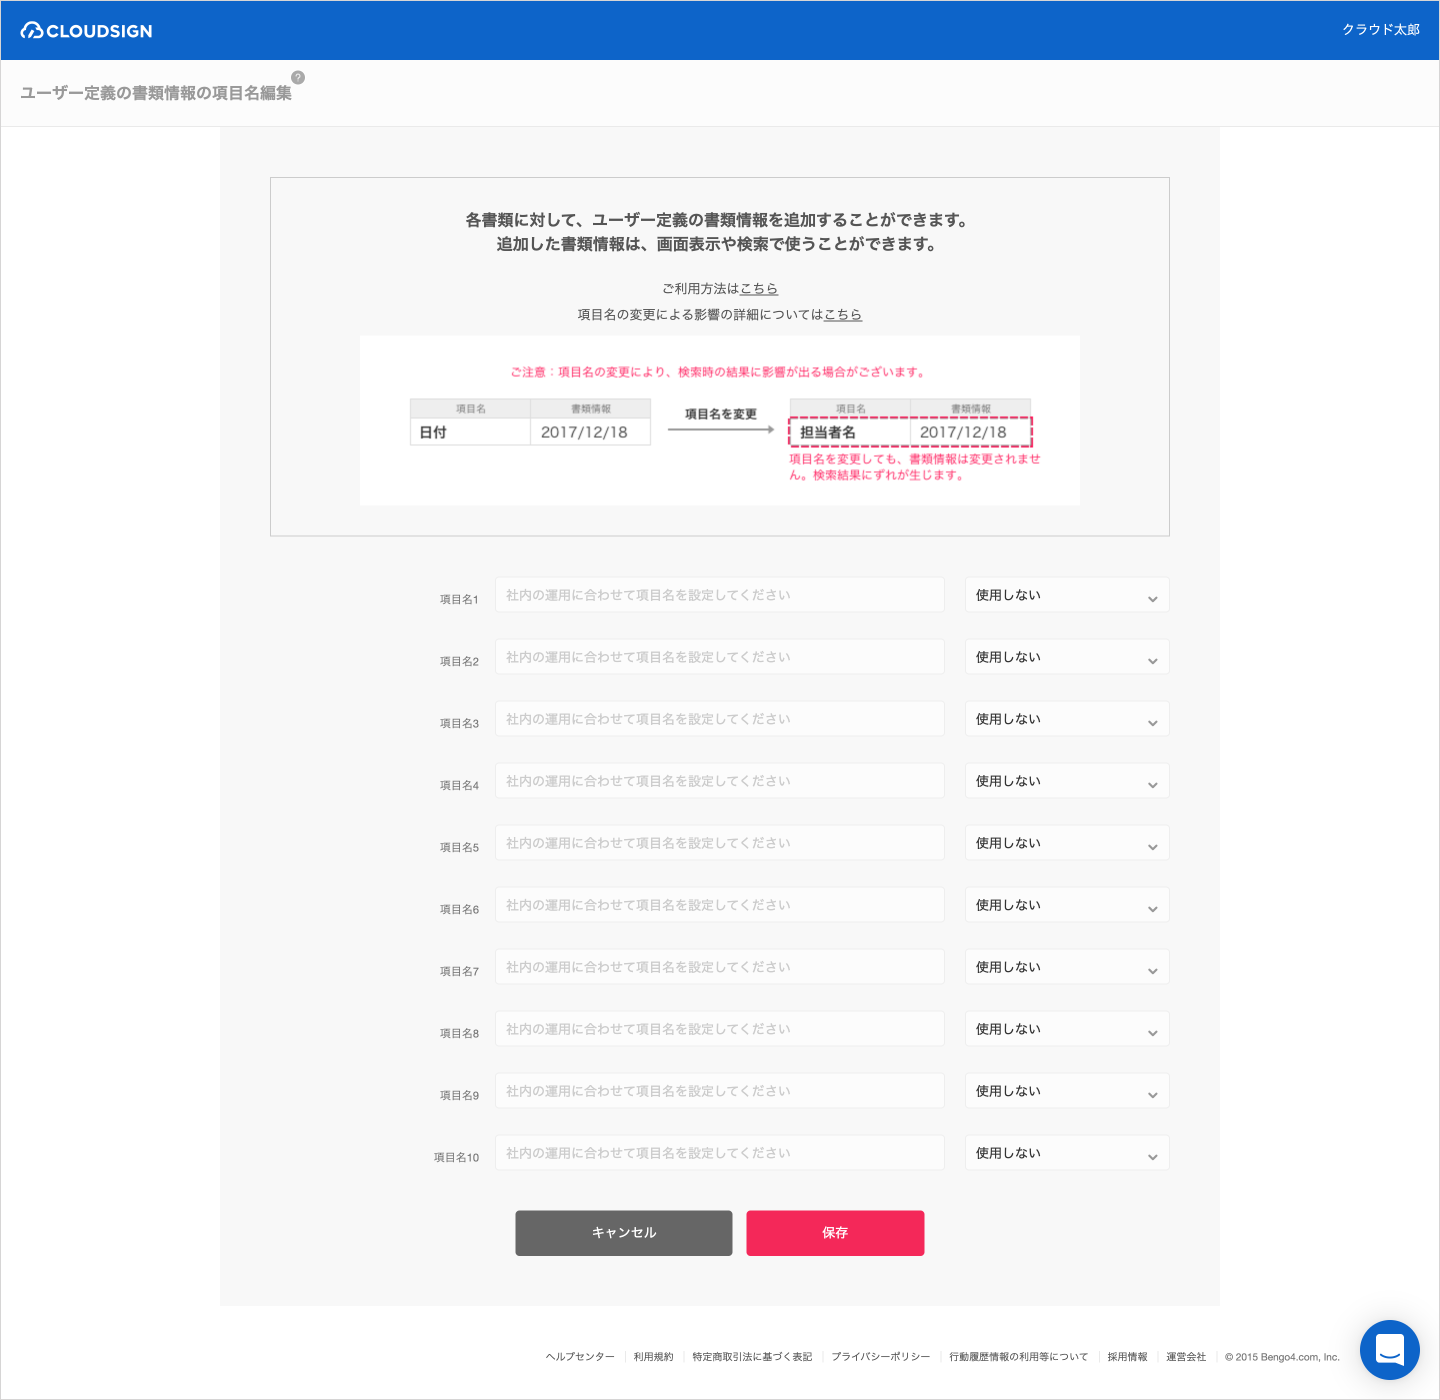
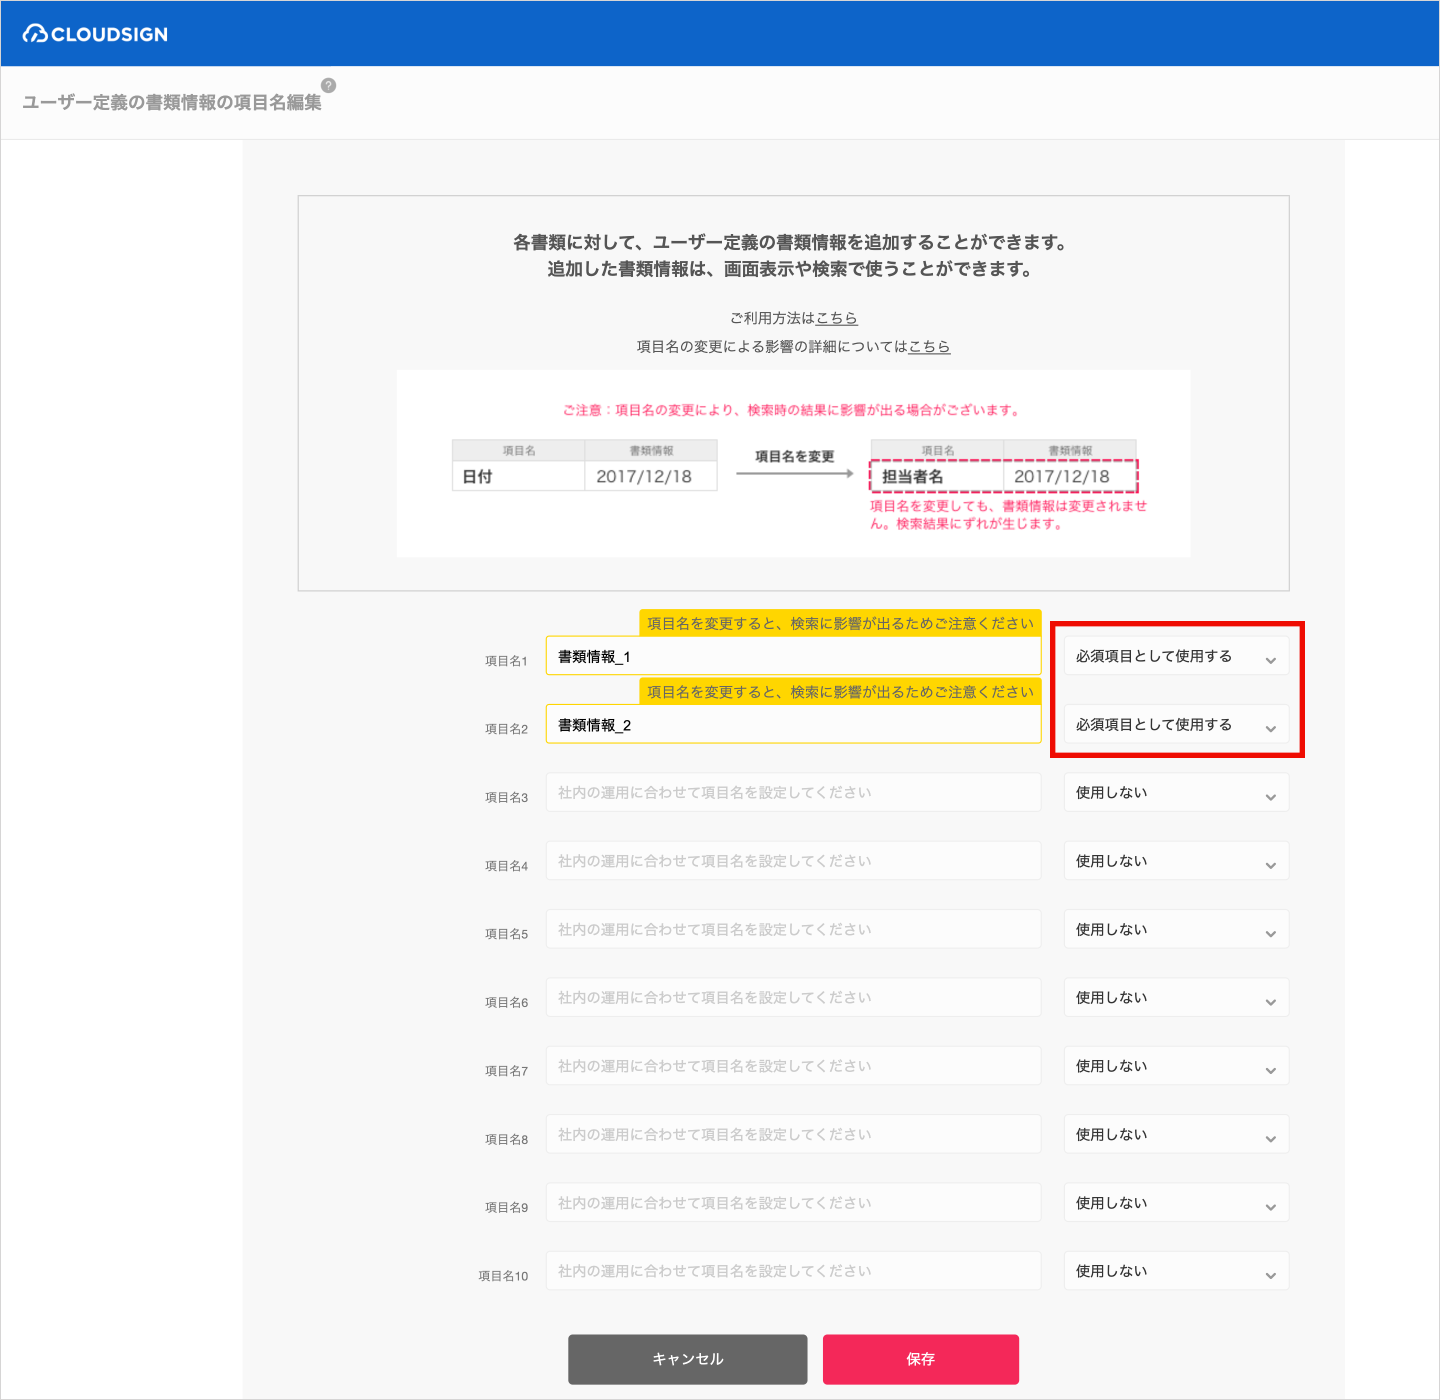
3. In the edit screen, entering the item name, selecting “Make item optional” or “Make item required” and saving it will adds the item to document information visible to administrators and members.
-
Item name: within 20 characters (including single-byte, double-byte characters)
-
Input field: within 500 characters (including single-byte, double-byte characters)
-
Duplicate item names cannot be specified.
4. This completes the required settings.
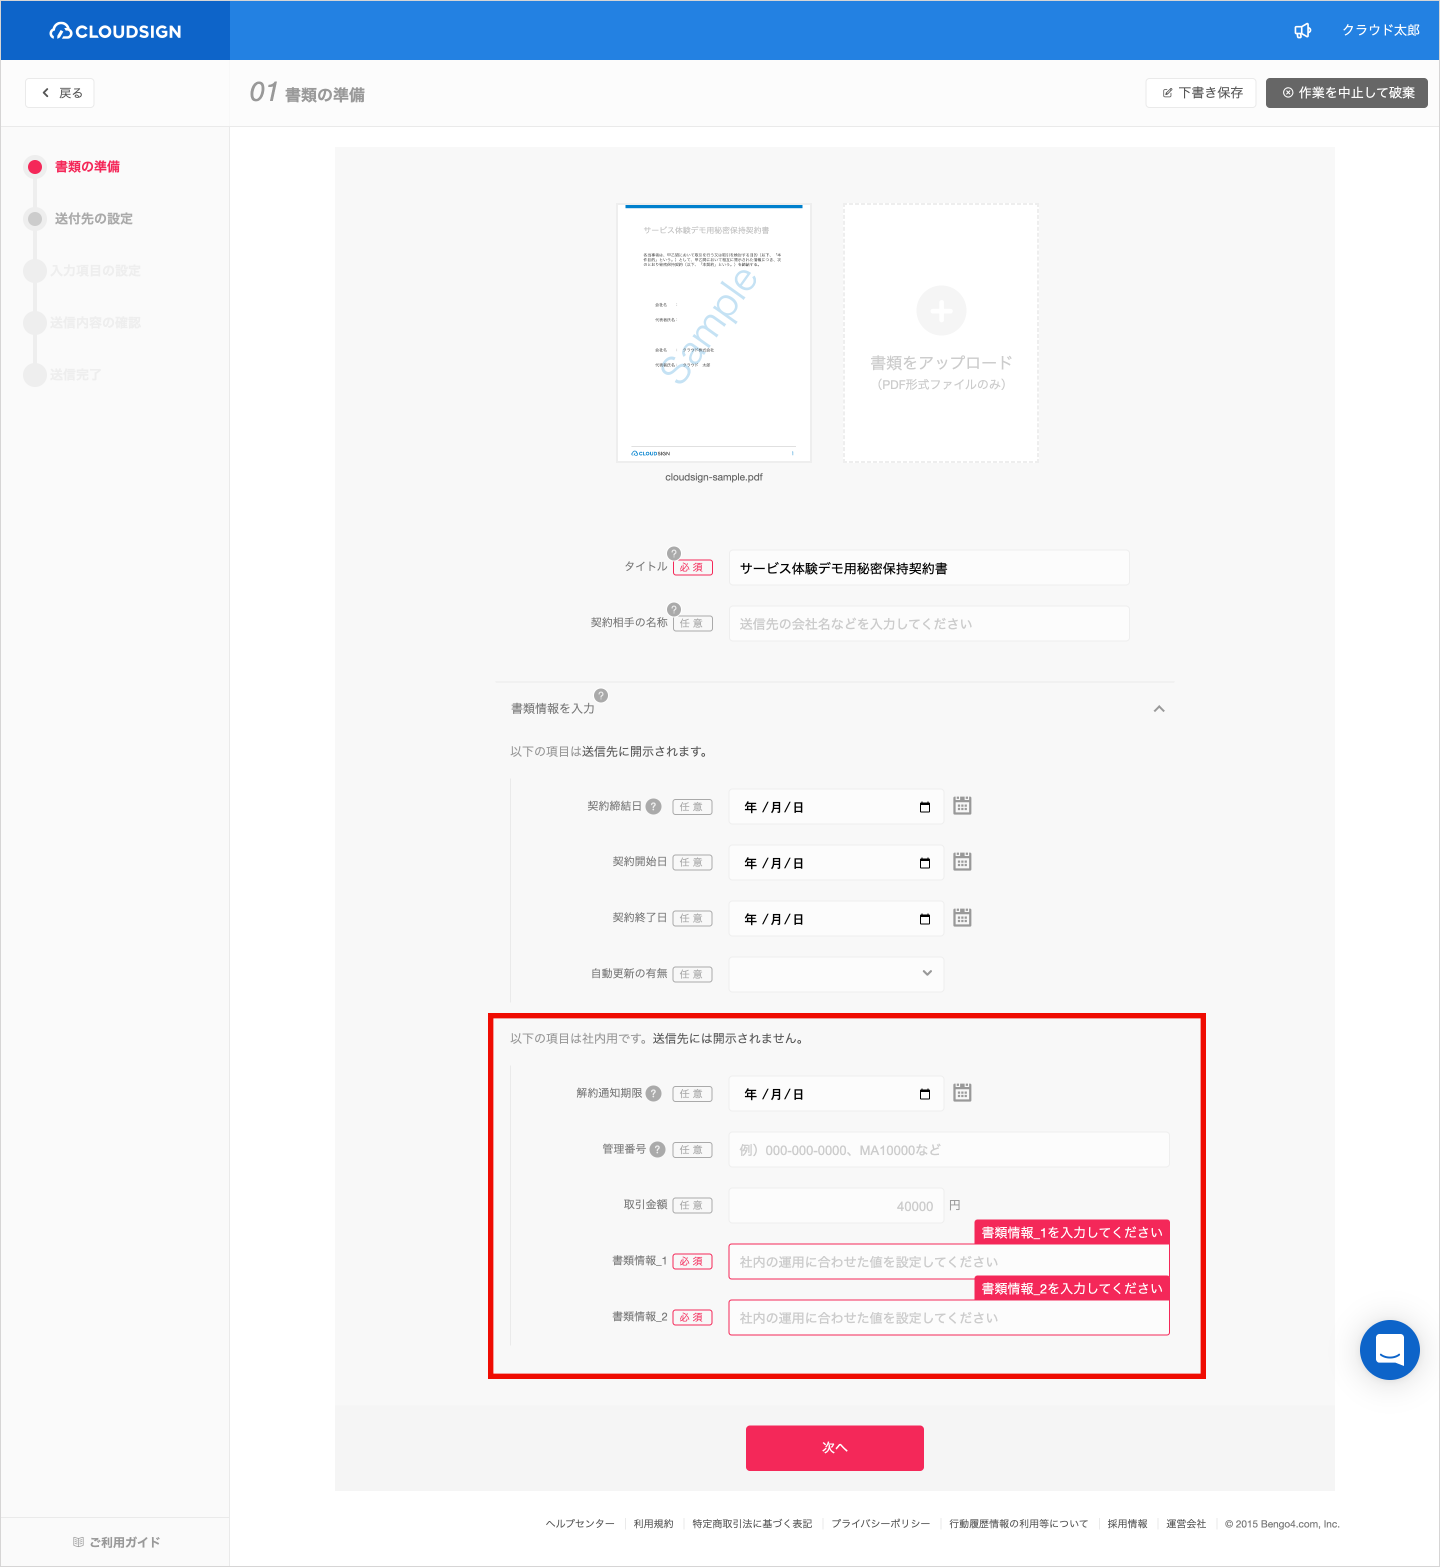
Select “Make item required” for document information items that need to be entered when sending documents.
If “Make item required” is selected, you will not be able to save drafts or proceed to the next step if there are required items are left empty.
Precautions
After sending documents, user defined document information is shown as “Optional items” in the edit document information screen.
Document information cannot be made required for documents sent using the following functions.
-
Bulk sending function
-
Send using API
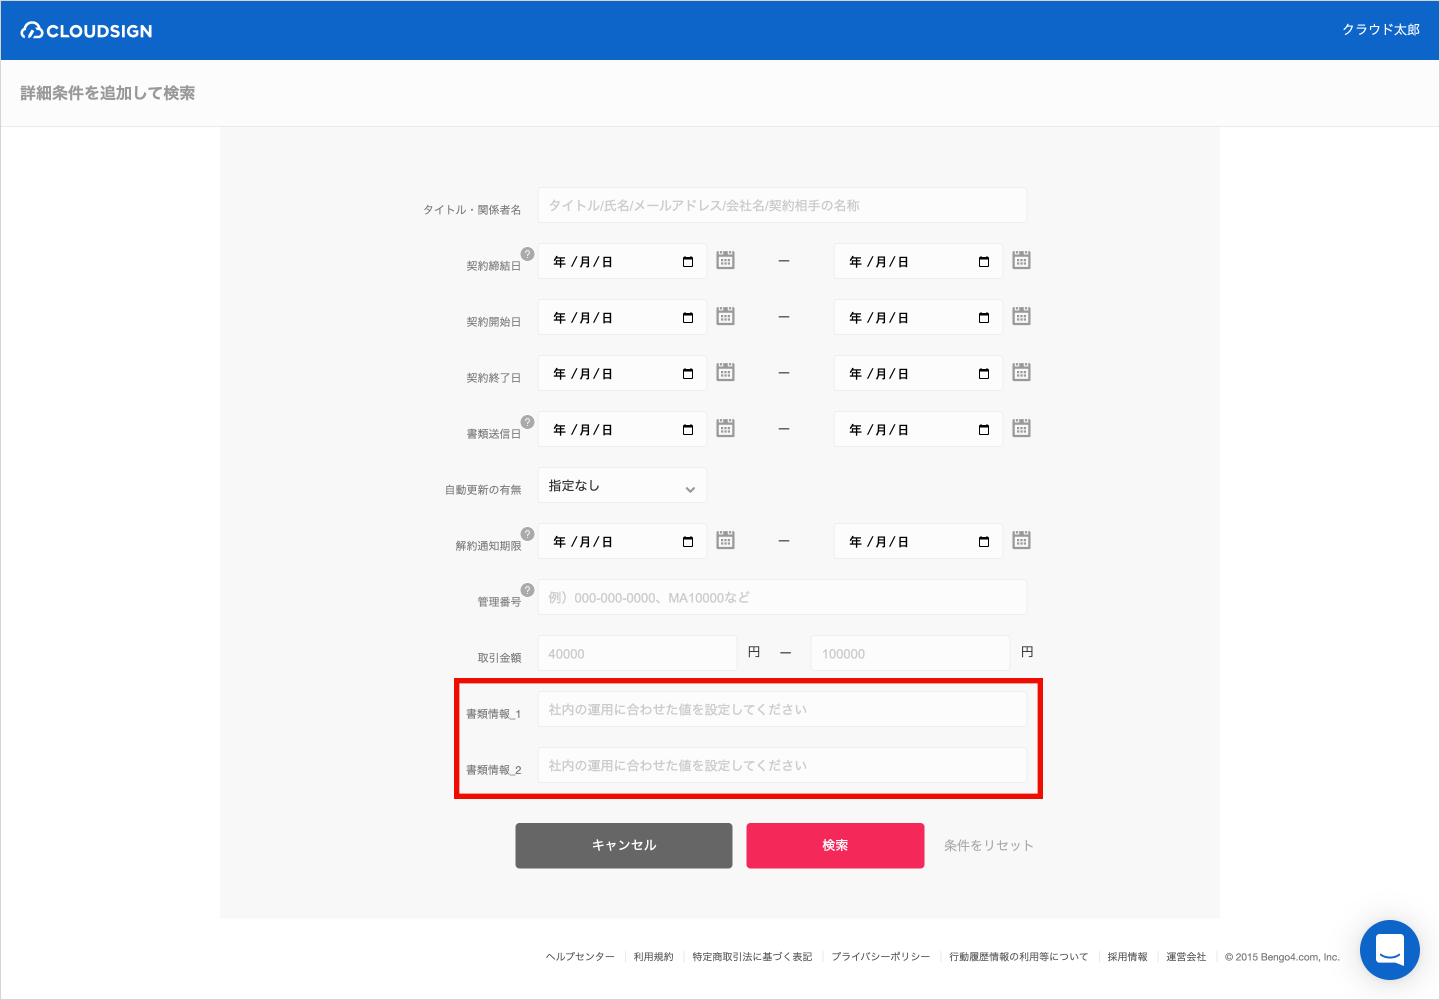
To search for these items, click the ▼ symbol and select “Add detailed conditions.”
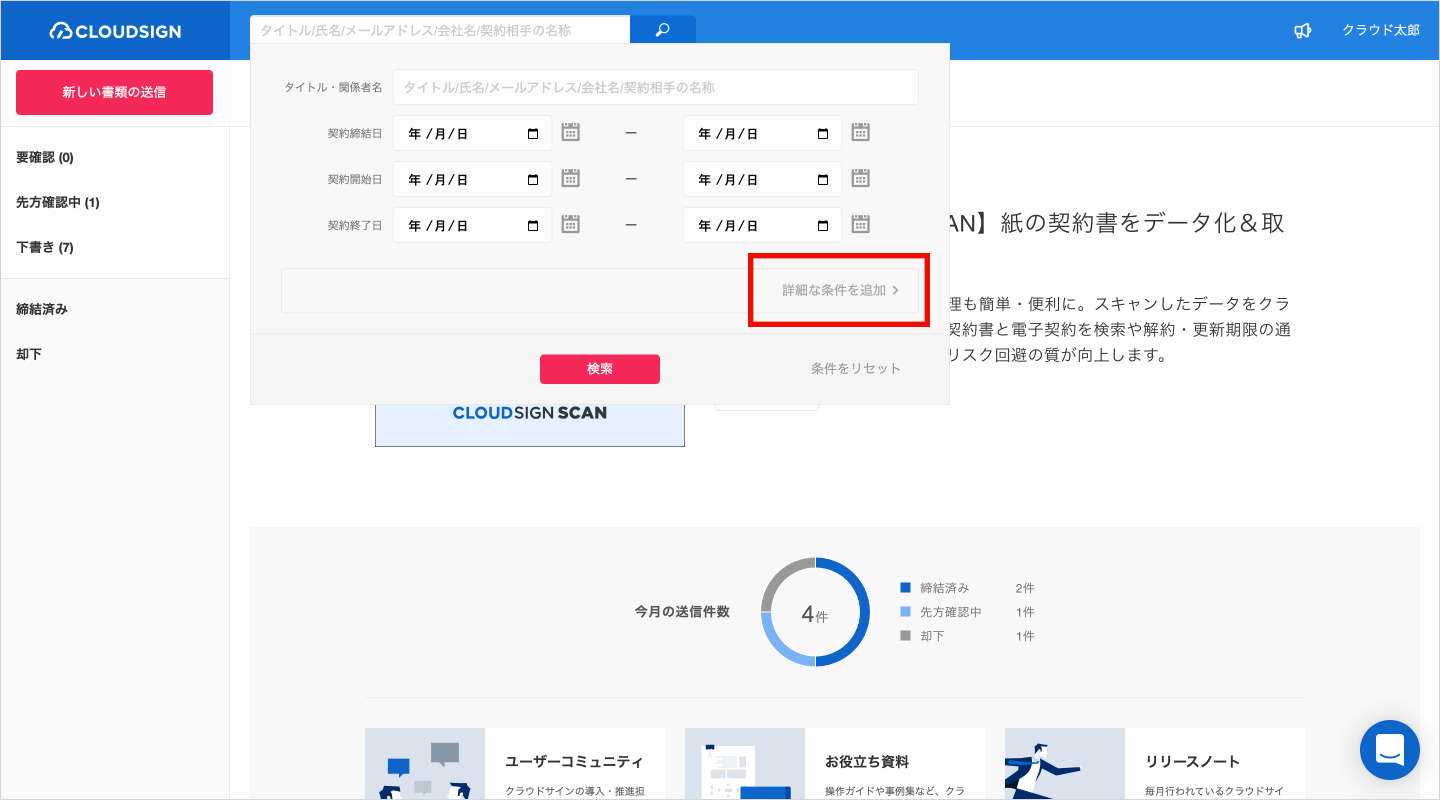
The user defined items you have added are shown, and can be used for searches.
Select “Do not use” for items that you no longer use.
These items will also be deleted from member screens.
Beware that changing existing item names may affect the results of searches. See here for more details.